Checking In and Adding Charges |
Top Previous Next |
Let's say Mr. Able decided to get an early start and arrived at your campground today instead of tomorrow. Now you need to change the start date for his reservation and check him in. You could use the previous procedure to change the start date first, or you can just check him in. Since Campground Master knows that you don't normally check people in until they're here, you can save a step.
1) Right-click on Able's reservation on the Rack (it doesn't matter which part of the reservation for this operation). This menu will appear:
2) Click on Check In. This prompt will appear:
3) Click Yes (or press the Enter key). Since they're not scheduled to arrive today, you'll see an extra prompt that you wouldn't normally see:
4) Click Yes (or Enter), and you'll be asked if they're staying the same number of days, as in the previous example.
5) Click Yes (or Enter) to have them stay the same number of days.
Now you will be taken to the Transactions dialog:
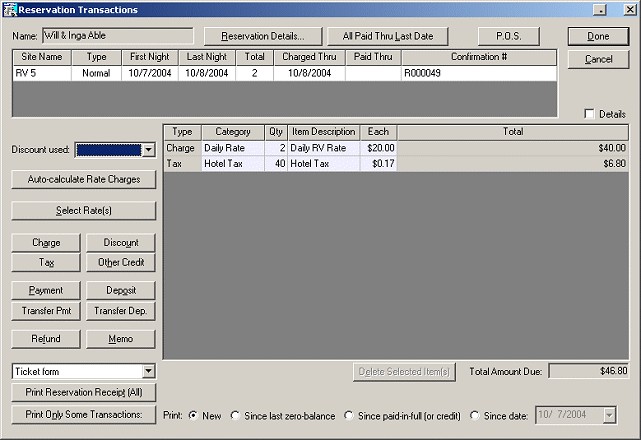
Because we have Auto-Rates enabled and set to automatically add charges on Check-In, Campground Master has figured out the appropriate rate for this site and the length of stay and added the appropriate charges. They appear in blue to indicate that they are auto-charges.
6) Now assuming he's ready to pay the bill, we just need to enter the payment. Click the Payment button, and a Payment Entry dialog will appear:

7) Notice that the amount is already filled in. They're going to pay the full amount in cash, so all you have to do is click Cash to select the payment type, and click OK. (If they were paying by another method, you could enter credit card details, check #, or other reference information if you like.)
The payment will be added to the transaction list:

8) They probably want a receipt, so you need to print one. Click the Print Reservation Receipt button, and a preview will appear:
If you have a printer connected, you can go ahead and click the Print button, and then you'll see Windows' normal Print dialog. Click OK to print it out. Otherwise, just click Close on the preview window to cancel the printing.
You'll notice that the Paid Through date has been automatically set (since it now has a zero balance after a payment, the program automatically knows this).
9) Now back at the Transactions dialog, click Done to finish up. Mr. Able's reservation will now be shown in green to indicate that he's checked in:
That's it, he's checked in and paid in full.
Next step -- Starting Walk-In Reservations from the Rack